

Who can do this: Membership Managers (Configuration menu is not visible to standard Users). Complete this one-time setup before enrolling your first members.
Step 1: Create programs
Memberships → Configuration → Programs
Each program represents a class or curriculum at your school.
|
Field |
What to enter |
|---|---|
|
Name |
Display name shown to staff (e.g. "Youth Karate") |
|
Tuition Product |
The Odoo product used for monthly billing. Must be a service product marked Can be Sold. |
|
Tuition Price |
Read from the product's list price. Update the product to change the default. |
|
Enrollment Fee |
Default one-time initiation fee for this program. |
|
Location |
Leave blank to share across all locations, or pick a specific company. |
|
Active |
Uncheck to hide from new enrollments without deleting history. |
Tip: Create one tuition product per program (or per price tier). The product name appears on invoices.
Step 2: Configure membership settings
Memberships → Configuration → Settings
Open the Memberships section in Odoo Settings.
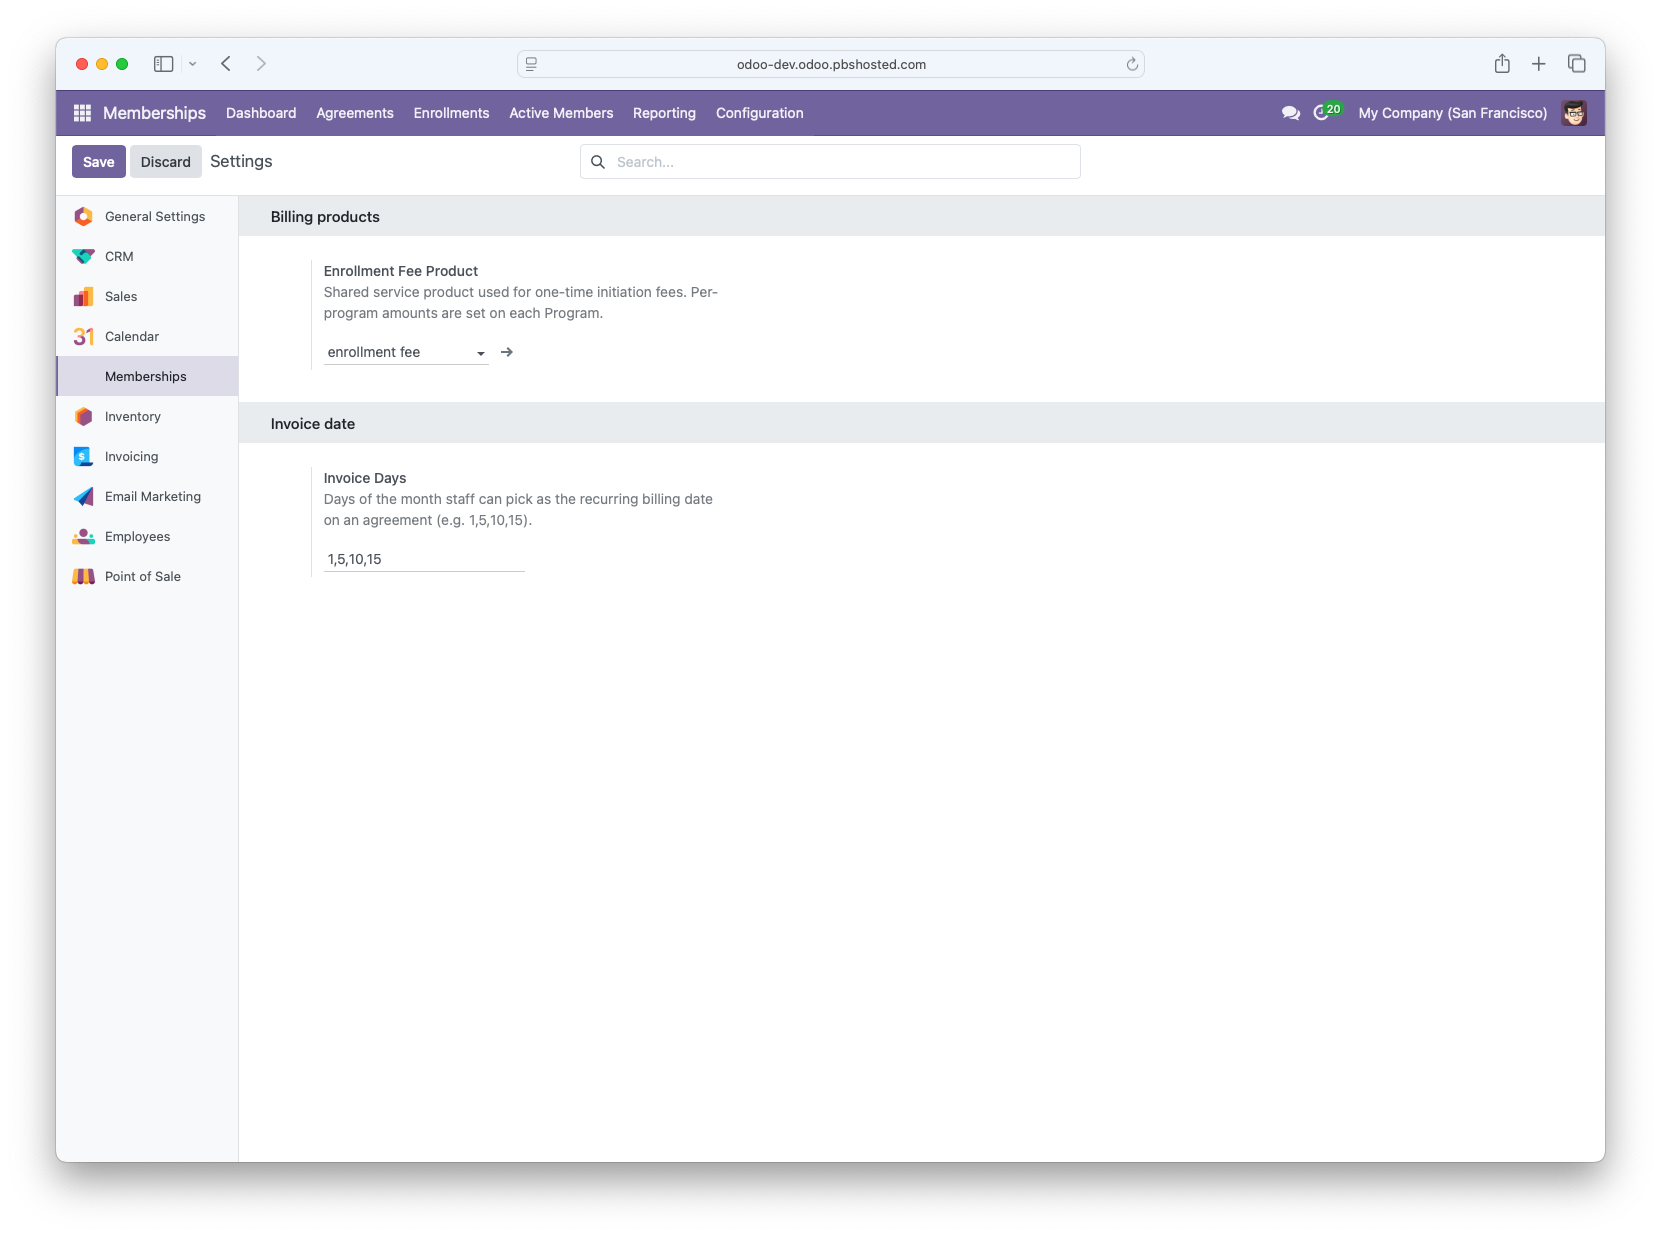
Enrollment Fee Product
Pick a single shared service product used for all one-time enrollment/initiation fees. Per-program amounts are set on each Program record; this product is just the invoice line item type.
If you don't have one yet, create a product such as "Enrollment Fee" (type: Service, Can be Sold) under Sales → Products, then select it here.
Invoice Days
Enter the days of the month staff can choose as a family's recurring billing date.
Example: 1,5,10,15 allows billing on the 1st, 5th, 10th, or 15th of each month.
This list appears on each agreement's Billing Day field when Contract Billing is installed.
Step 3: Review term types
Memberships → Configuration → Term Types
Default term types are installed automatically (12-month, 6-month, pay-in-full, month-to-month). You can:
-
Add custom term types (e.g. "Summer Special - 3 months")
-
Adjust duration in months
-
Mark a term as Month to Month if it should auto-renew from day one
The End Date on an agreement is calculated automatically from the start date and term type duration.
Step 4: Set up agreement templates
Memberships → Configuration → Agreement Templates
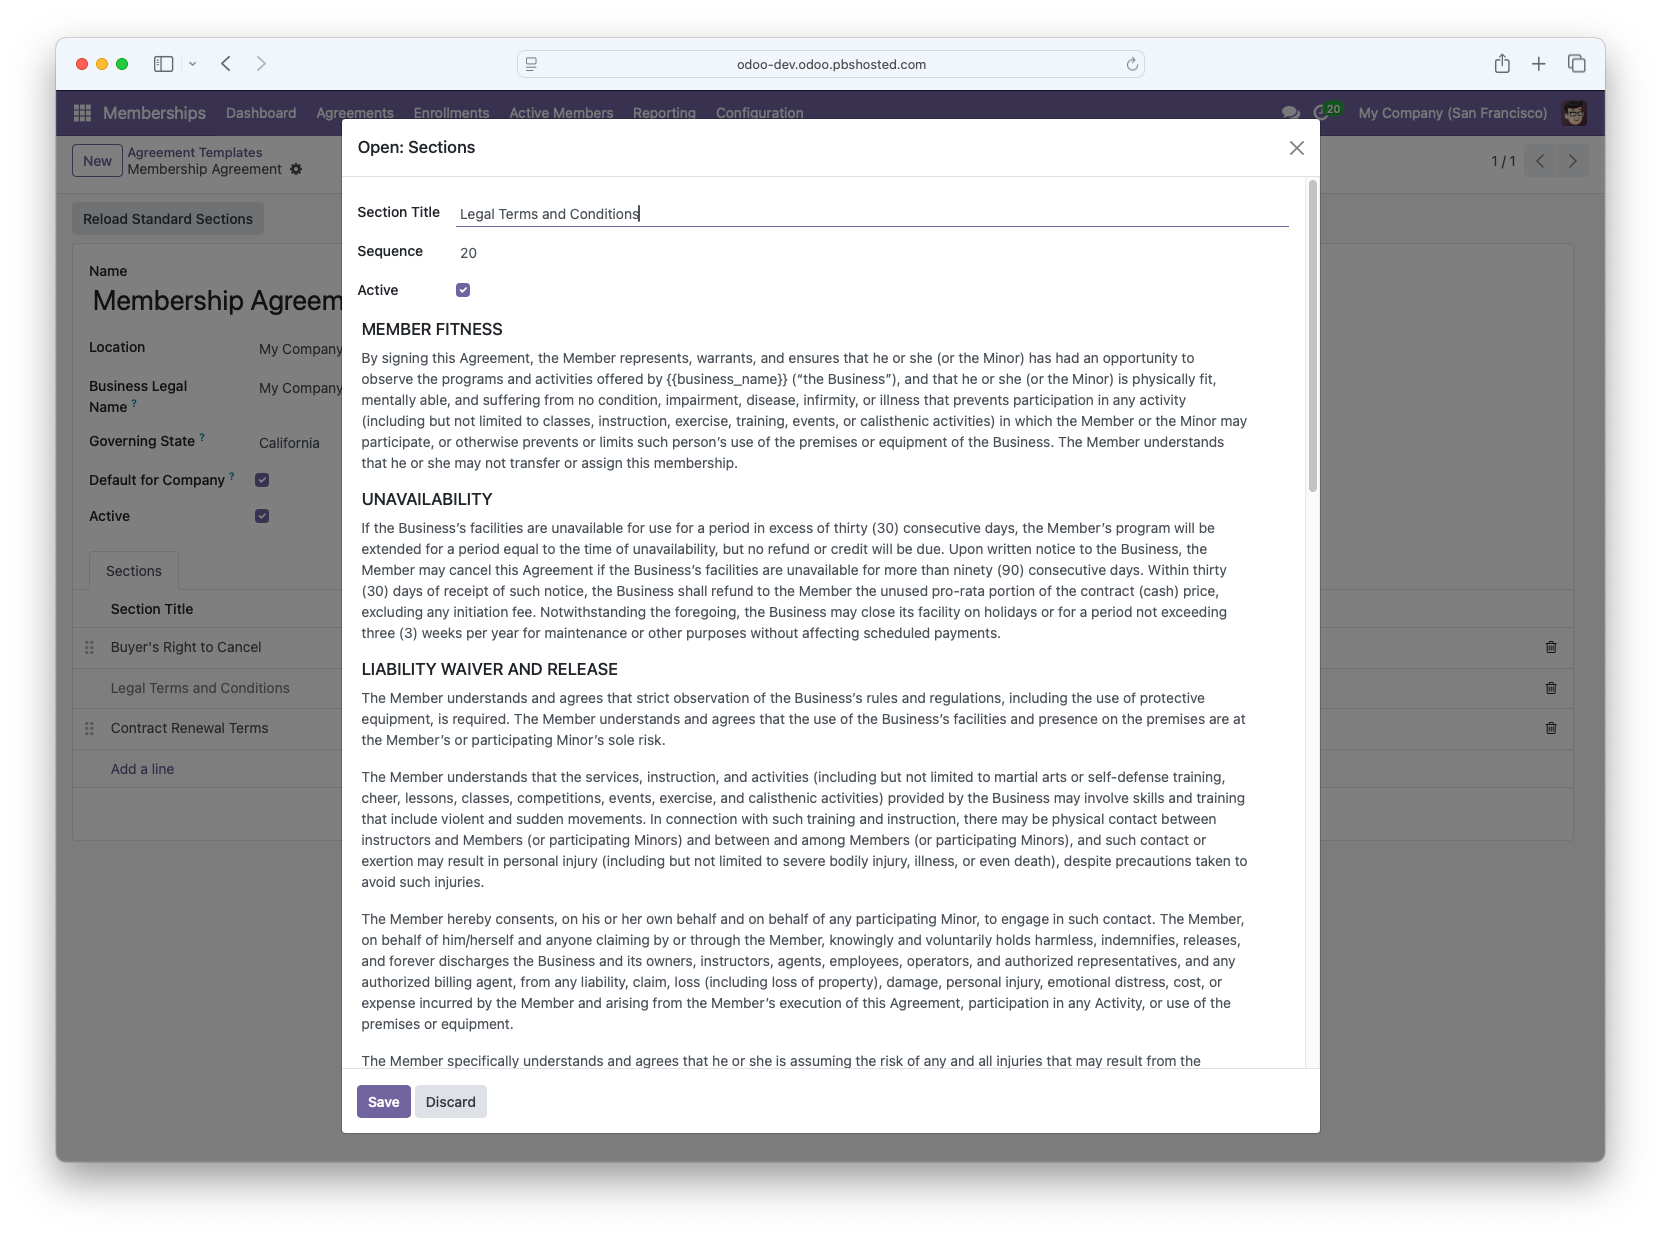
Agreement templates define the legal text and layout of the printed membership agreement PDF.
Creating a template
-
Click New
-
Enter a Name (e.g. "Standard Membership Agreement 2026")
-
Set Location to your school/company
-
Check Default if this should be pre-selected on new agreements
-
Add Sections - each section has a title and HTML body
Placeholders
Use these placeholders in section content; they are replaced when the PDF is generated:
|
Placeholder |
Replaced with |
|---|---|
|
|
Your company name |
|
|
State from your company address |
Default legal sections (Buyer's Right to Cancel, Liability Waiver, etc.) are created automatically when the module is first installed. Review them with your legal counsel and customize as needed.
Important: Agreement templates are per-location. If you run multiple schools (companies), create a template for each.
Step 5: Assign user access
Settings → Users & Companies → Users
For each staff member who will manage memberships:
-
Open their user record
-
Under Access Rights, find Martial Arts Memberships
-
Assign User (day-to-day) or Manager (includes Configuration)
Salespeople with CRM access can also use Create Membership from opportunities if they have Sales permissions.
Optional: Billing and payments setup
These require additional modules installed by your administrator:
|
Topic |
Guide |
|---|---|
|
Recurring tuition and enrollment fees |
|
|
Card on file and auto-pay |
|
|
Email/SMS marketing lists |
Configuration checklist
Before enrolling your first member, confirm:
-
At least one Program exists with a tuition product and prices set
-
Enrollment Fee Product is selected in Settings
-
Invoice Days are configured (if using Contract Billing)
-
An Agreement Template exists for your location and is marked Default
-
Staff users have the correct Membership User or Manager role